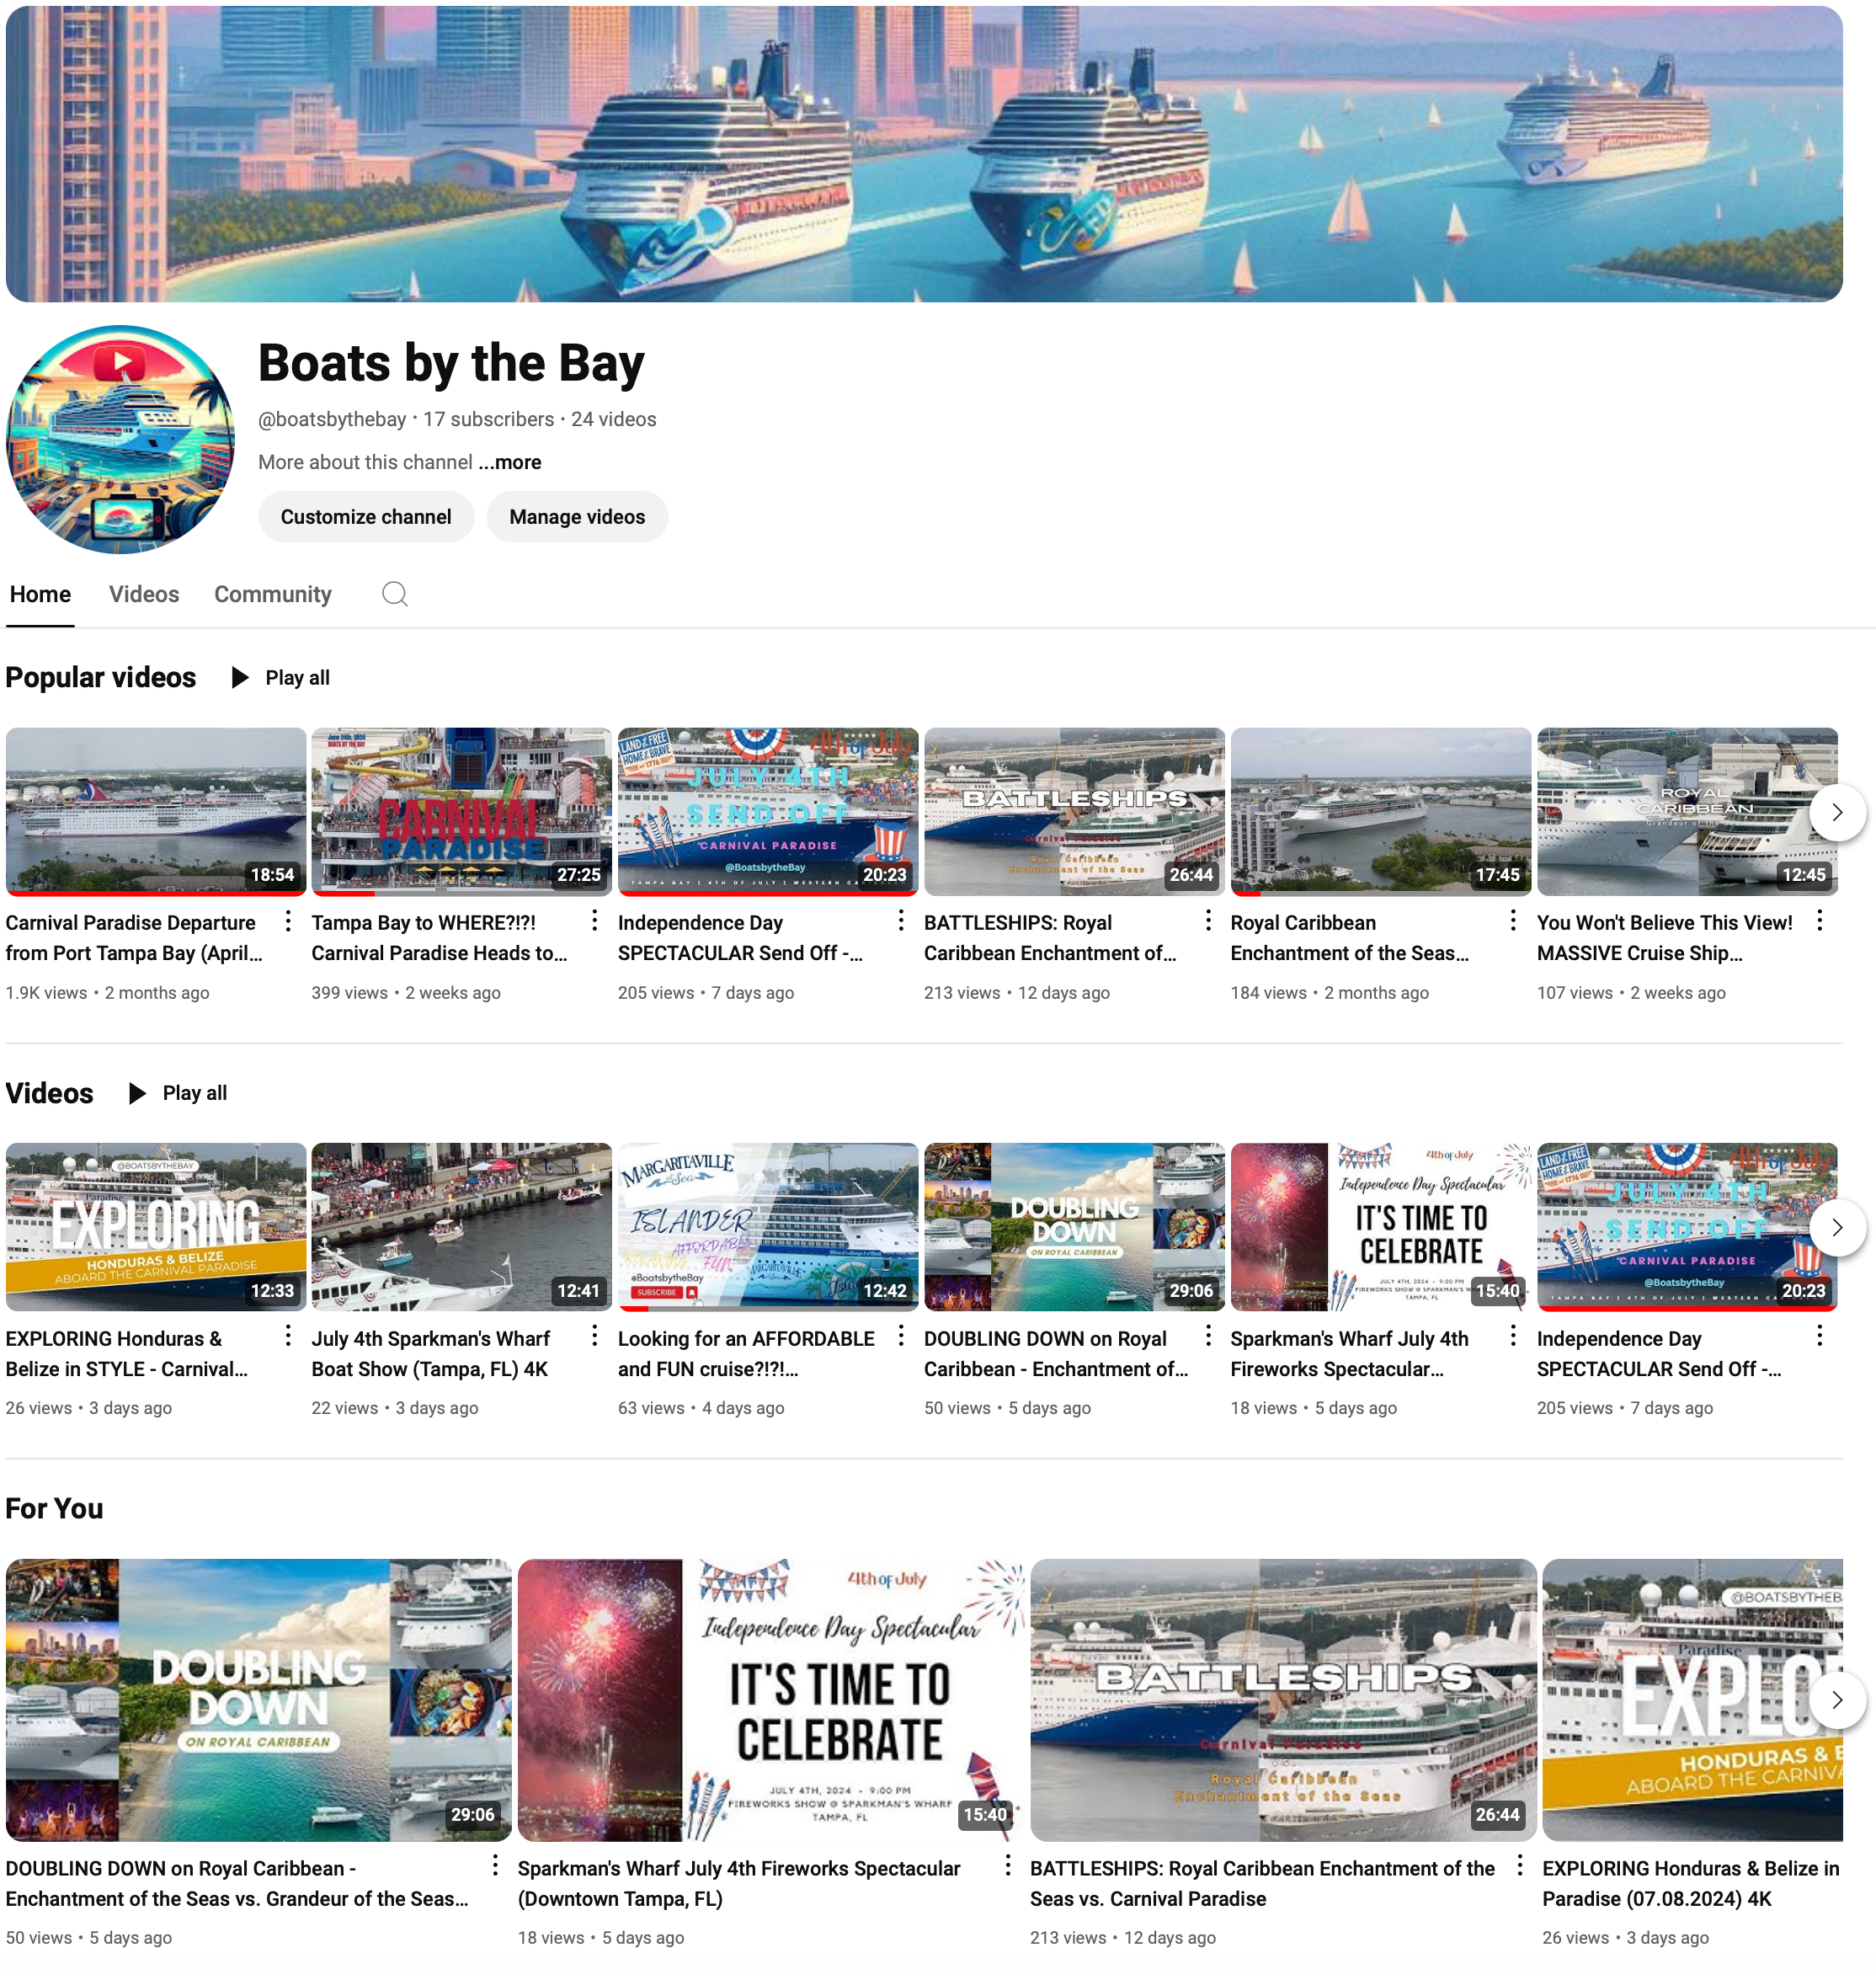
Boats by the Bay
One thing I love about my current apartment is the view. But what’s even cooler than simply a great view is that the cruise port is right there. That means cruise ships come and go all the time. I always love watching the ships leave and one day thought, “You know what? Maybe other people would like to watch as well!” That’s when I decided to fire up my camera and give YouTube a try.
How does it work?
One nice thing about the cruise ships going out of Port Tampa Bay is that they always begin their departures at 4pm. That means if I see a cruise ship docked then I know they will be taking off later that day and I can play to be ready for that exact moment.
To do the actual filming I currently use my iPhone 15 Pro Max recording in 4K 60fps. I used to use a dedicated vlogging camera (Sony ZV-E10) when I began, but found that using my iPhone was better for a few reasons:
My iPhone has a better zoom length and I didn’t want to drop a bunch of money on a new lens for this one side project
My iPhone has a much bigger viewing screen, making it easier to tell when things are out of focus
My iPhone allows for much smoother pinch-to-zoom control; my ZV-E10 can zoom, but it is much more jittery in the transition
My iPhone seems to have way better autofocus; my ZV-E10 often would get out of focus, making the video quality seems well below 4K
I never have to worry about my iPhone not being charged or having enough storage space
It’s much easier to transfer data from my iPhone to my Mac Mini, plus I can take advantage of Airdrop (plus I don’t have to worry about then needing to reformat my SD card every time!)
My other piece of equipment is an Onn 52” Tripod (yes, the Walmart brand.) For less than $15 I was able to upgrade my setup without feeling as though I have invested a bunch of money. When I first began I actually started by propping up a portable file tote on top of the small table I keep on my balcony and then balancing my mini tripod on top of that. It was about as makeshift as I could do, but it worked well enough to get my idea off the ground. This is a good lesson in learning to make do with less. You don’t always need to fanciest equipment to get the wheels of your idea in motion!
In order to get the videos onto my Mac for editing I utilize Airdrop, except I go a step further and physically connect my phone to my computer so I can get wired speeds. Unfortunately, iCloud Photos syncing is terrible, so I can’t simply take a video then have it magically show up on my Mac. Thankfully, wired Airdrop is really quick with my phone so even these hefty video files don’t take all that long to copy over.
Once I have the video on my Mac I create a new project in iMovie and dump the file in there. My videos are extremely straight-forward so I don’t need any fancy editing software. All I do to a video is:
Select the ‘Stabilize Shaky Video’ option. This takes a long time to work its magic, but is worth the wait. Since I am filming on by hand with a cheap tripod, my camerawork is less than Oscar-worthy. Using this iMovie feature turns my jittery filming into effortlessly smooth video. Note: The default option when you select this option in iMovie is 33%. I have found that unless I truly need the added help smoothing things out, it’s better to drop that % down to something less like 15%. Essentially what iMovie is doing is cropping your video in order to make it look smooth - the more you crop, the more smooth you can make your video seem. The issue for me is that I am filming large objects that up a lot of screen real estate, so excessive cropping can begin to distort the images I am trying to show.
What I have recently been doing is selecting the magic wand on the top left of the video editor, which automatically adjusts the color and sound of my video. I used to do sound editing myself (reducing background noise, adjusting overall sound %), but found it was about the same as using the magic editor, which is as easy as clicking a single button. In terms of color, there’s not a massive difference when using the magic editor, but it does seem to help increase the contrast a bit, which I think looks nice. Again, for the simplicity of a single button, I think it’s worthwhile to use this feature.
The last editing steps I do are to add in a beginning and ending title. In iMovie this is as easy as dragging and dropping from the available options. Video-to-video I keep the messages pretty much the same, so this step is super quick to knock out.
The final thing I need to do in iMovie are to give my video a title and then export. Helpful note: When exporting, make sure that the resolution is set to what you want. By default, iMovie will try to export movies in the lowest possible resolution, so be careful.
Now we have a video that’s ready to go to YouTube! I simply go to studio.youtube.com, click the upload button in the top right and select my new export. The actual export takes a really long time to complete, so in the meantime I work on some other items. Quick Note: For YouTube to continue uploading your video, you must have the URL open at all times. If you close out of YouTube then your upload will stop. It’s OK if this happens as it’s easy to fix. If for any reason your upload gets stopped, you have 24 hours to go back and restart the process. To do this you simply click the upload button again and reselect the same file as you did before. Note: The file must be in the same file path for this to work; you cannot select the same video, but located somewhere different than before. YouTube will recognize you are re-uploading the same file and will simply resume progress on it rather than you having to start over from the beginning. This also works if your video stops showing upload progress (even if you didn’t leave the URL).
While the video is uploading I will work on the other YouTube items. This includes creating a title, a description, creating a thumbnail, selecting an end screen, and picking when I want my video to debut.
Title: I have been experimenting with titles recently. When I began I used generic titles (boat name, date, etc.) Then I tried out using BOLD and INTERESTING type titles (if you use YouTube you know exactly what I mean by this!) So far I haven’t found a massive difference between these two extremes, but will keep experimenting.
Description: This is another area I have been experimenting. I have tried longer style descriptions, but have recently been going with short ones. I simply write a couple lines about the video, include a link to whatever ship is being shown, and then dump in a bunch of hashtags that I reuse to help increase reachability.
End Screen: When you watch your favorite YouTubers, what do you typically see at the end of a video? You see a button to visit their profile and a suggestion for another one of their videos to watch. I never realized this before making YouTube videos myself, but it turns out that those options you see are actually designed by the creators. You can customize the end screen to feature what you want and where you want it on the screen. I keep things simple by using the same template every time: stacked on the left side of the screen is an option to view my profile page along with a suggested video for people to watch next.
Debut: Generally I will either post a video as soon as it’s been uploaded and processed or I may schedule it for the next morning so it have ample time to process up to 4K
The last piece I am missing is an awesome thumbnail. Funny enough, my most popular video to date only has a generic still-image thumbnail, but I still believe that making a great thumbnail can help in getting views. It’s also become a lot of fun to stretch these creative muscles each time.
For thumbnails I go to Canva since they make it insanely easy to create an awesome thumbnail for free. On Canva I select “YouTube Thumbnail” and then search the pre-made templates to see which one I think looks right for that video. I then make adjustments, add in my own screenshot(s), update all the text, and sometimes throw in some additional image elements. This is where I try to get as creative as possible and have some fun! Once my masterpiece is finished I go to Share —> Download and then upload that image to YouTube.
Now we finally have a completed YouTube video! This write-up may make it seem like a labor-intensive process, it’s actually quite straightforward now that I have nailed the process down. This project has been a lot of fun so far as I have gotten to learn about so much from filming to editing in iMovie to making thumbnails in Canva to learning YouTube. I definitely encourage others to try out a small YouTube project on the side, especially if you don’t work in a creative field!